Create Campaign
Here’s a detailed step-by-step document outline for creating a new campaign:
✅ Preconditions
- Admin user has valid credentials and is logged into the Loyalty Admin Portal. Here is how you can login to loyalty admin
- At least one mission is already created and available in the Missions tab. Here you can find how to create missions
📂 Steps to Create a Campaign
🔐 Step 1: Login
- Launch the Loyalty Admin Portal.
- Enter valid credentials.
- Tap on the Login button.
🎯 Step 2: Create Missions (if not already available)
-
Navigate to the Missions tab from the main menu.
-
Tap on Add Mission and configure:
- Mission Name
- Type (Discord, X, Token, Custom, etc.)
- Mission Rules
- Save the mission.
Please find link here for mission creation guide
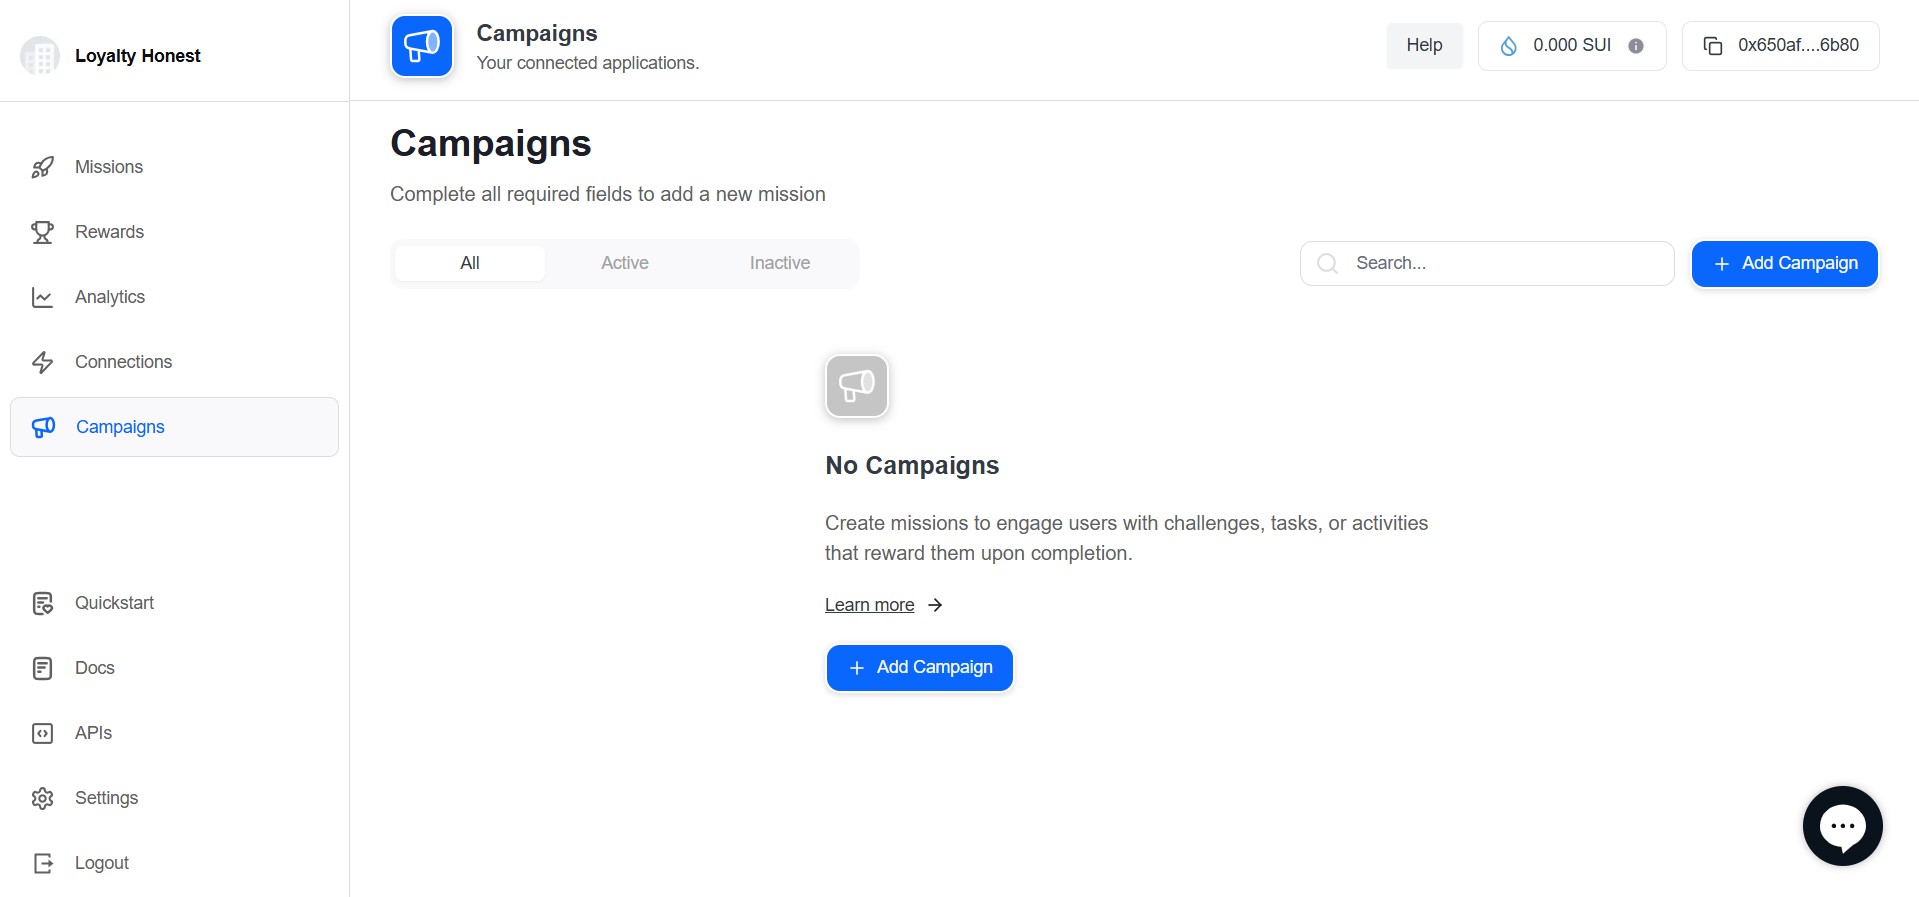
📁 Step 3: Navigate to Campaigns
- From the left-hand menu, go to the Campaigns tab.
- Tap on the Add Campaign button to begin campaign creation.
🛠️ Campaign Creation Wizard
The campaign creation consists of 5 major steps:
🔹 Step 1: Basic Information
Section Header: “New Campaign – Basic Information”
| Field | Description | Input Required |
|---|---|---|
| Campaign Name | The unique name of the campaign. | Yes (Text field) |
| Campaign Description | A short description about the campaign. | Yes (Text field) |
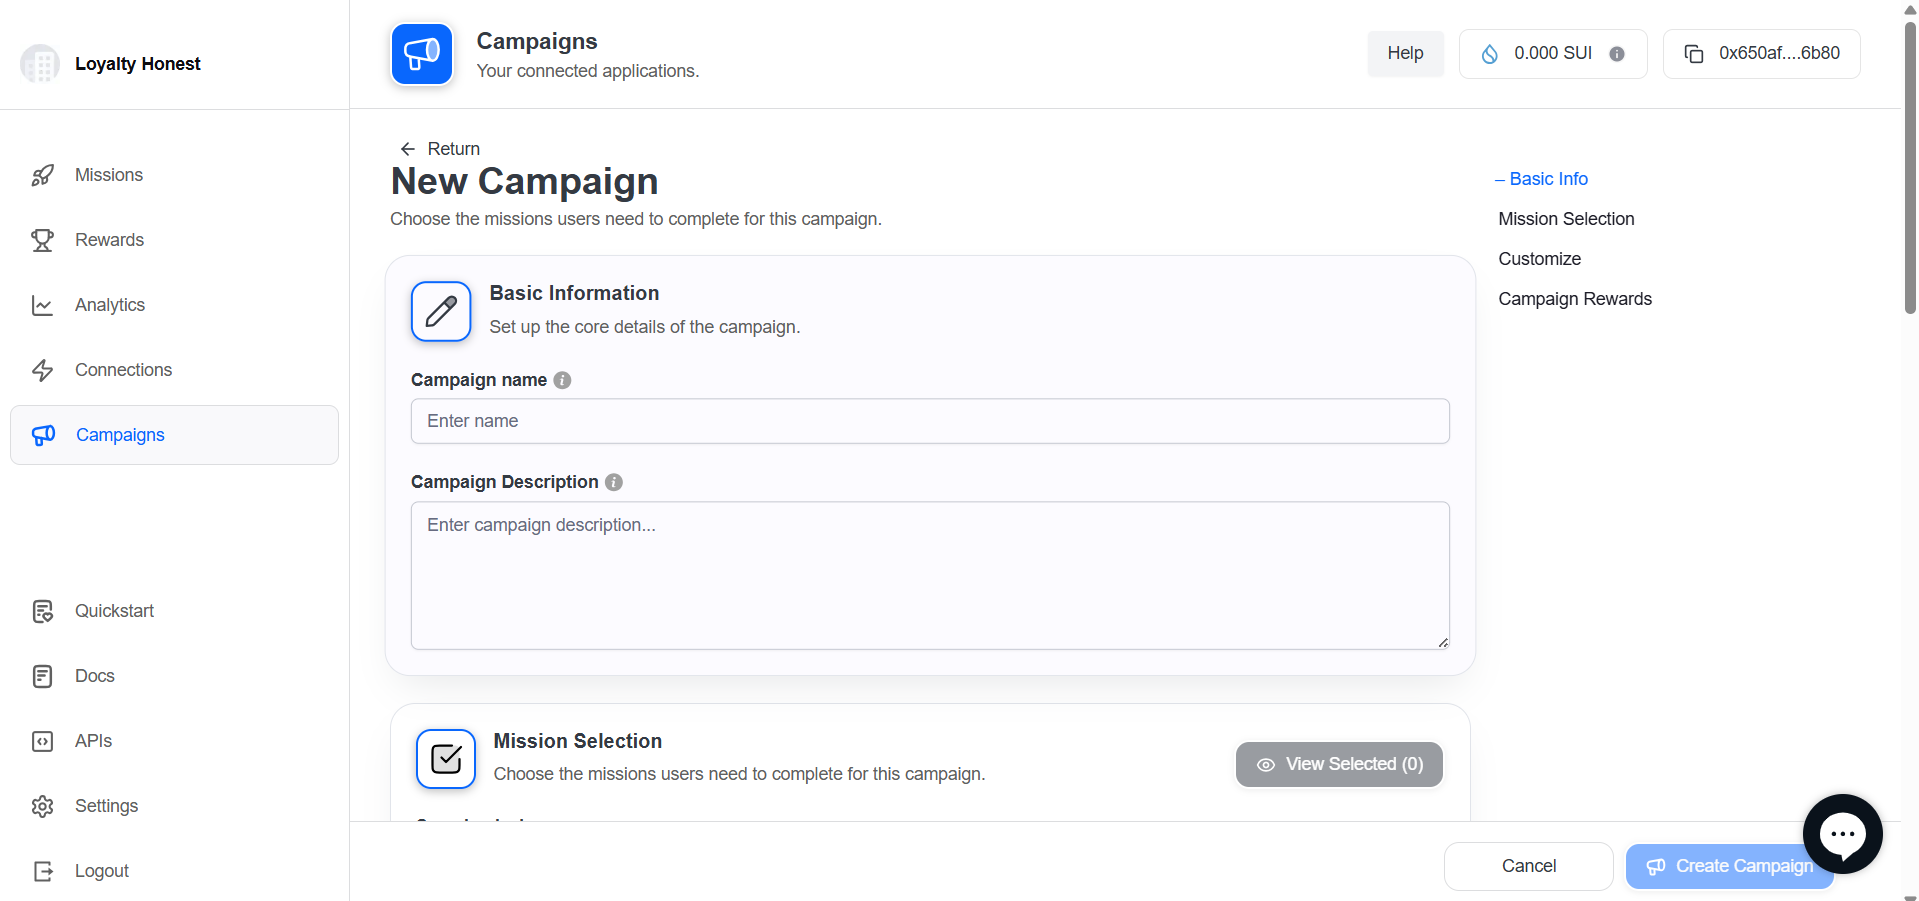
🔹 Step 2: Mission Selection
Section Header: “Choose the missions users need to complete for this campaign.”
Actions:
- Use the Search bar to find specific missions by name
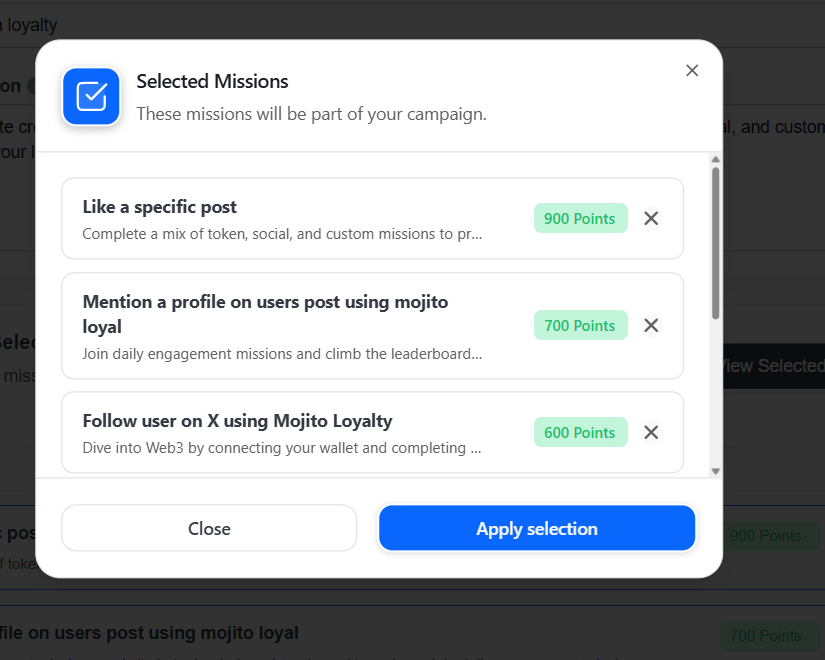
- Select missions from the list using checkboxes
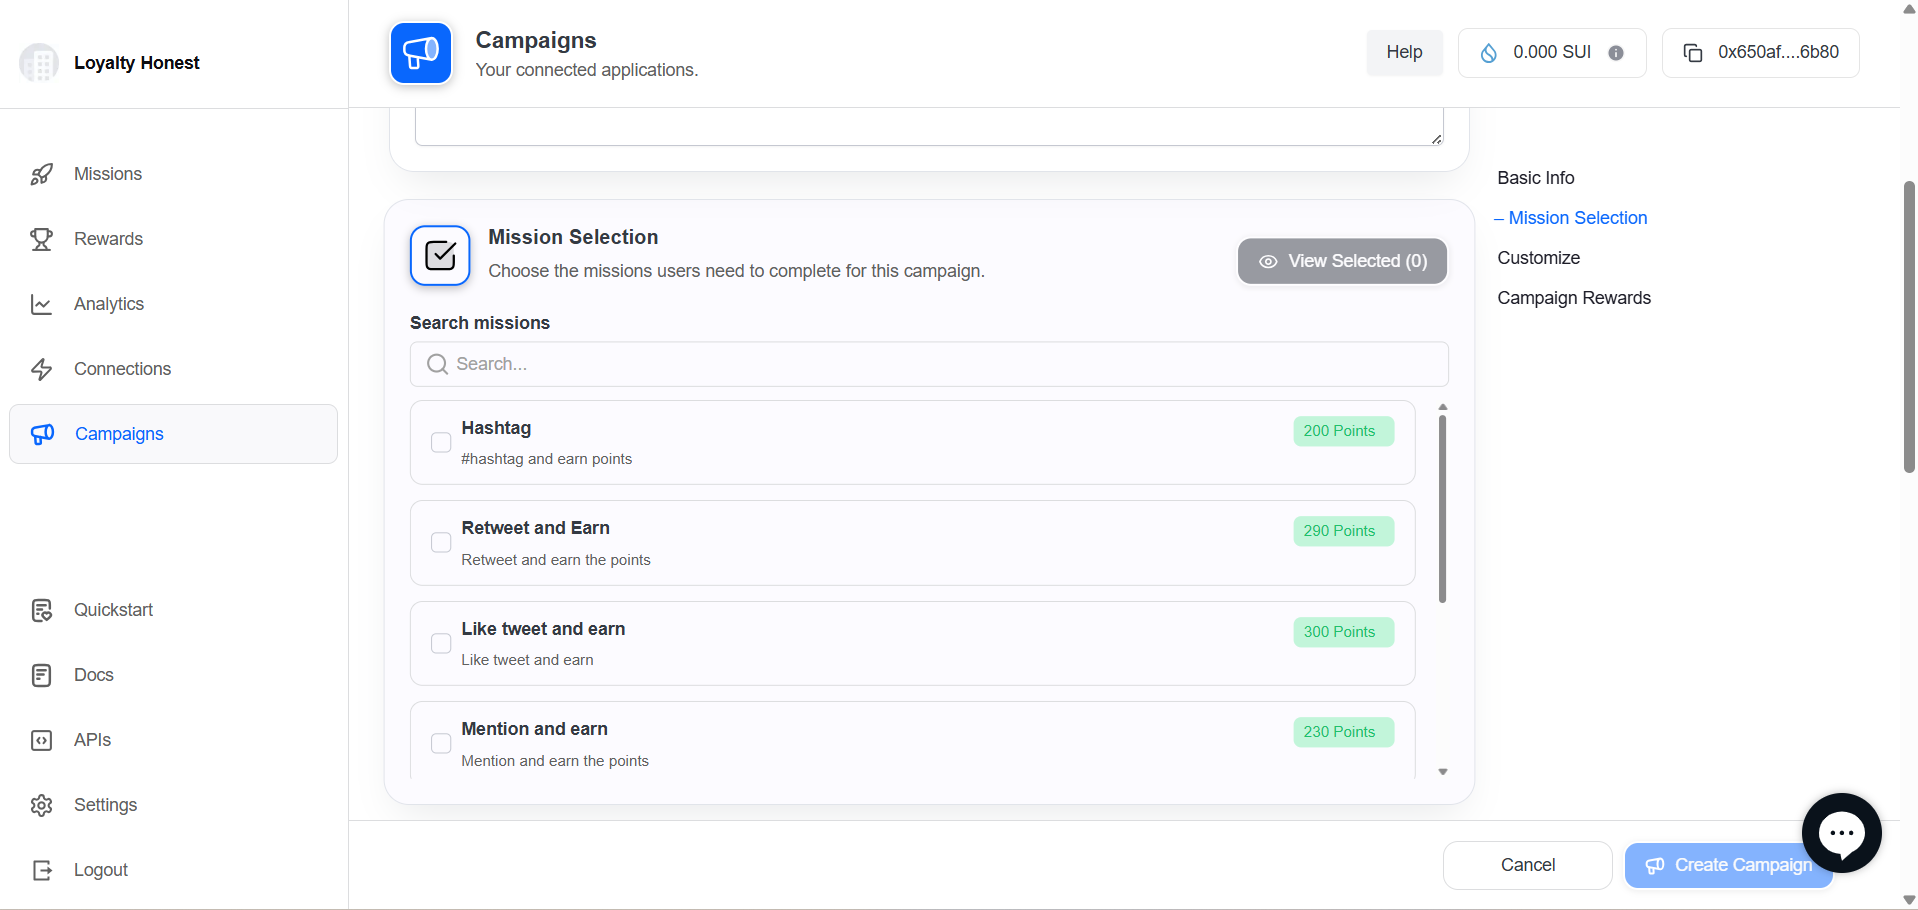
- Tap View Selected Missions to confirm the list.
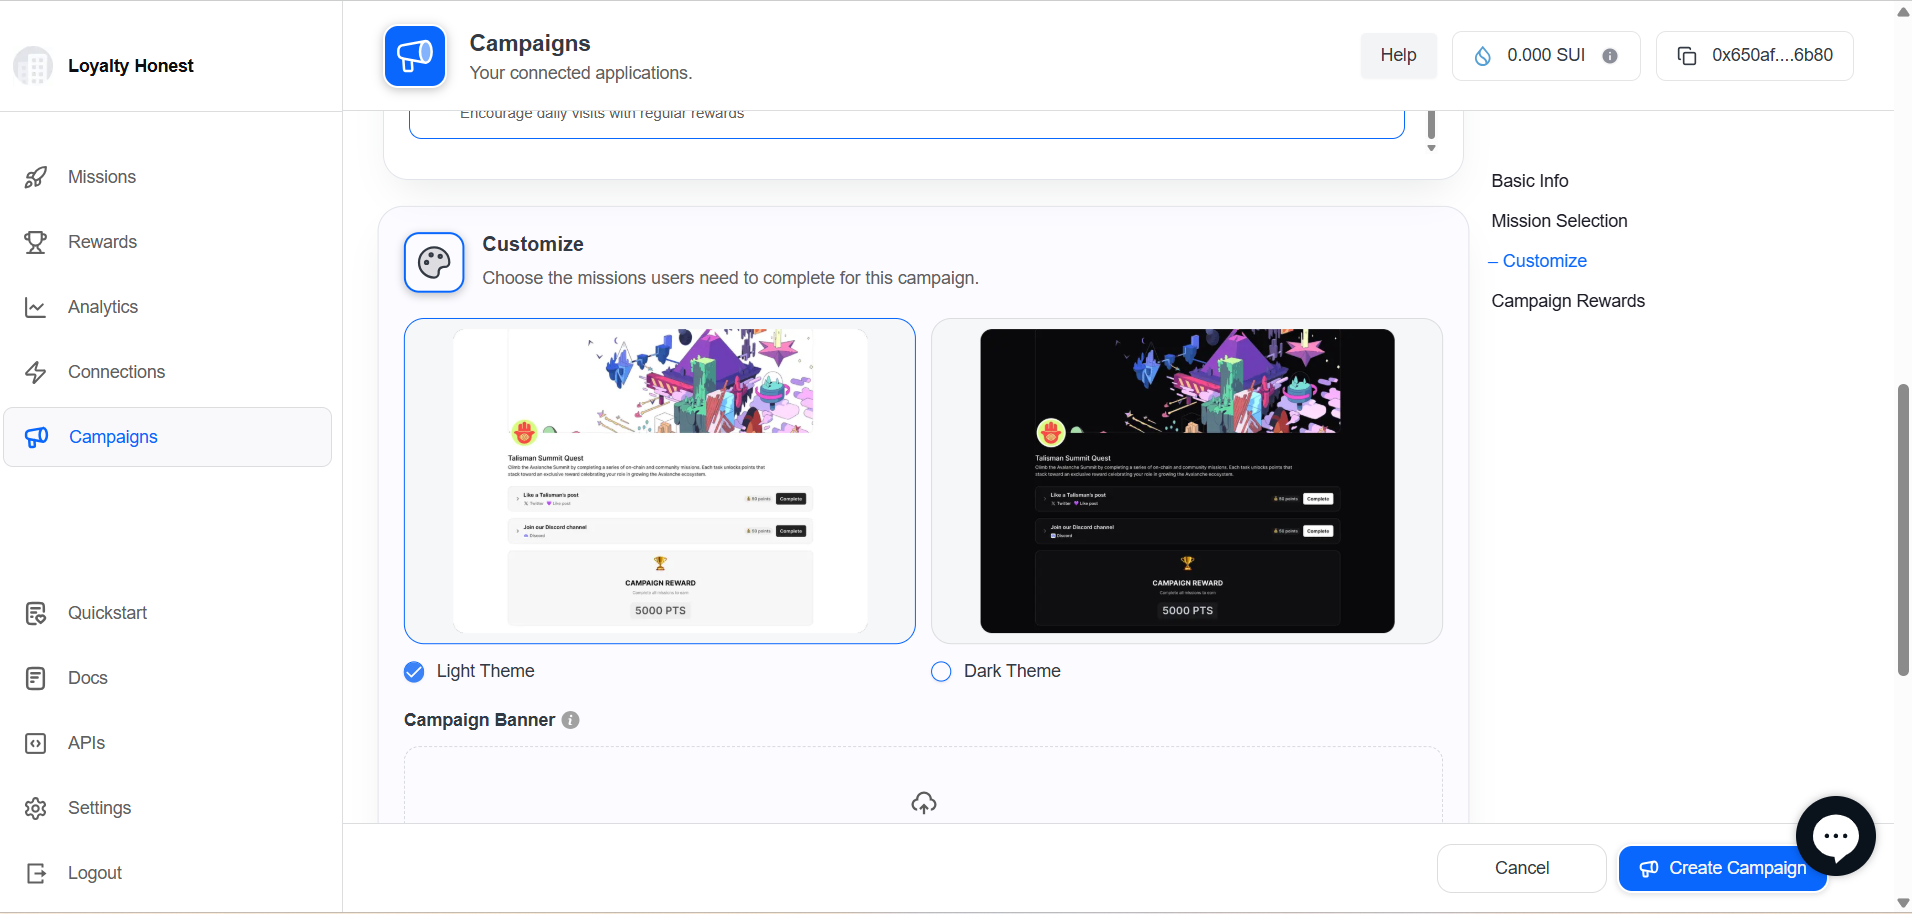
🔹 Step 3: Customize Theme
Section Header: “Choose the appearance for your campaign.”
| Option | Description |
|---|---|
| Light Theme | Default light-colored UI |
| Dark Theme | Dark background with white text |
🔘 Choose a theme by tapping on a radio button or card.
🔹 Step 4: Upload Campaign Banner
Section Header: “Upload a banner image for your campaign.”
| Field | Description |
|---|---|
| Upload Field | Drag and drop or click to choose file |
| Supported Formats | JPEG, PNG |
| Recommended Size | 1920x1080 pixels |
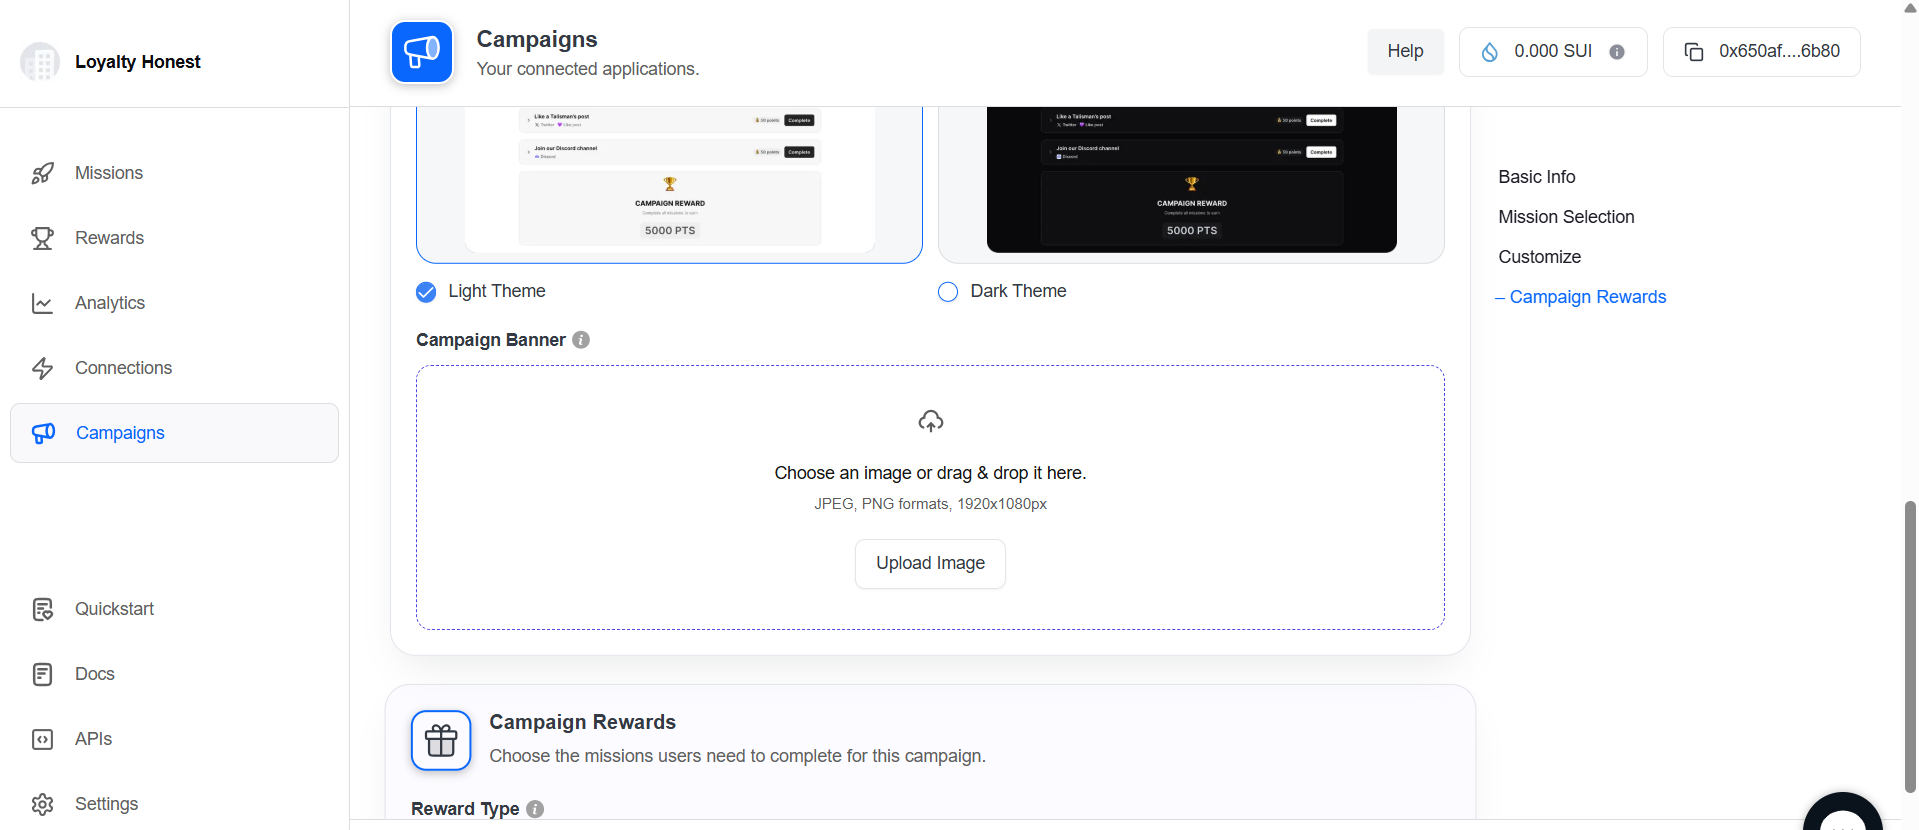
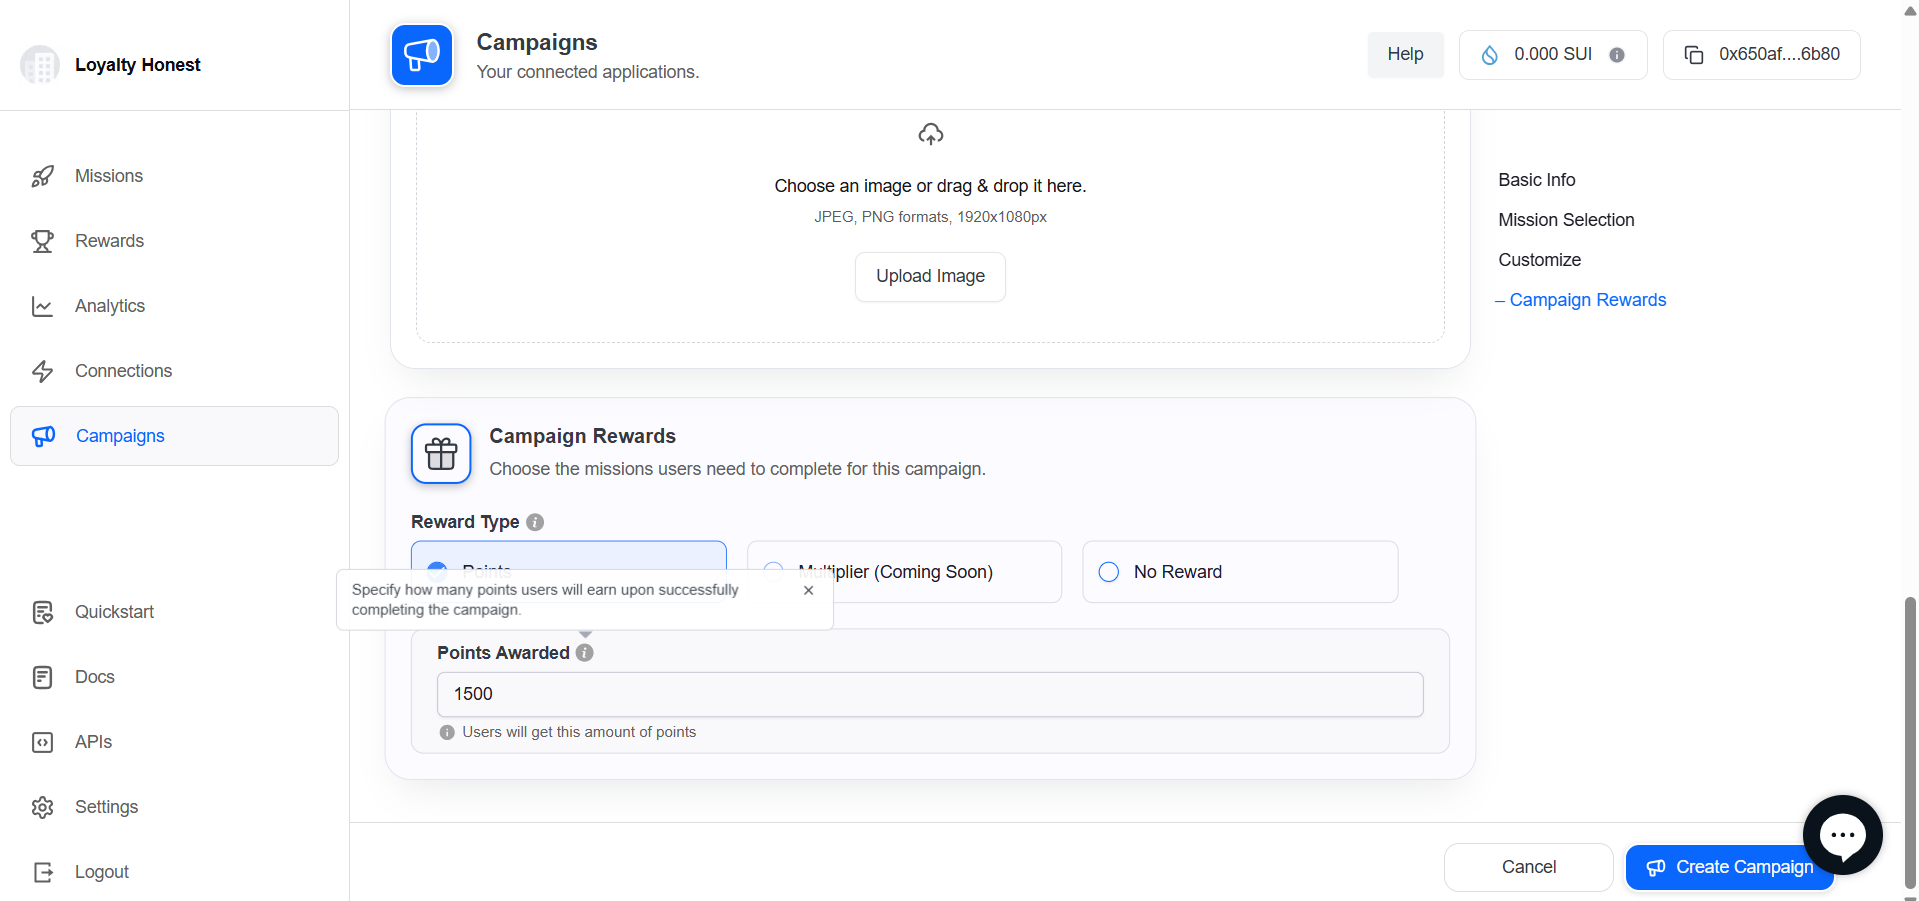
🔹 Step 5: Campaign Rewards
Section Header: “Assign rewards for completing this campaign.”
| Field | Description |
|---|---|
| Reward Type | Select the type of reward: |
| |
| |
| |
| Points Awarded | Enter the number of points users will earn for completing this campaign |
| Validation | Only numerical values allowed; |
🔘 Tap on Create Campaign to save and launch the campaign.
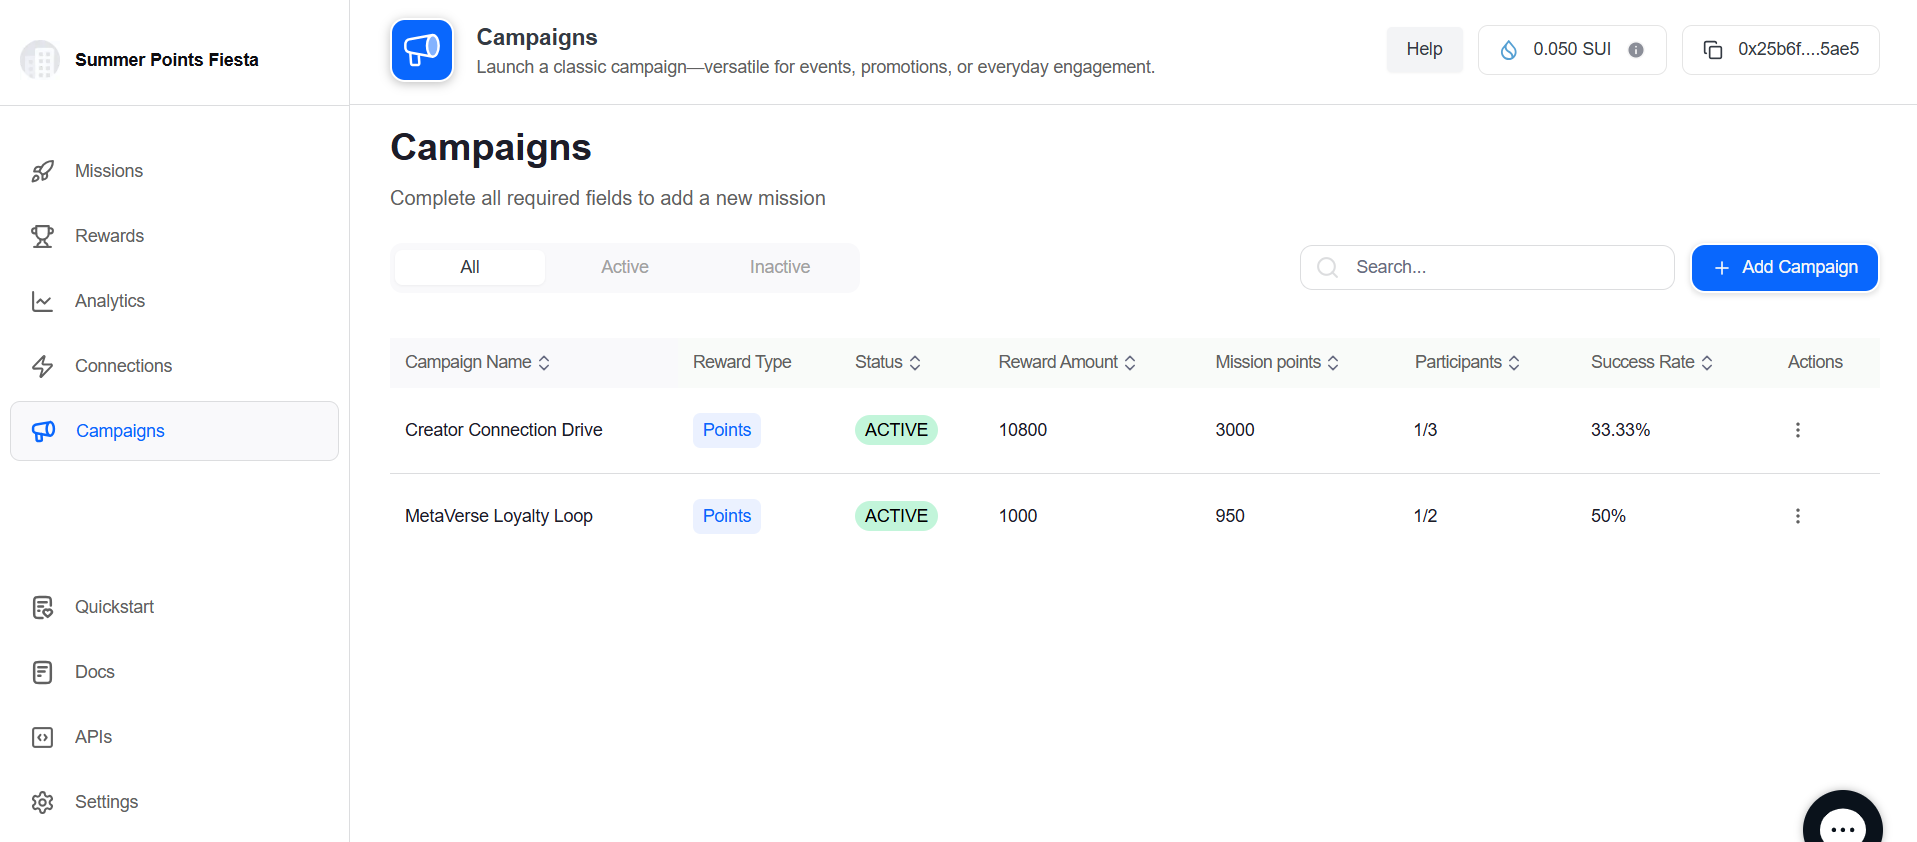
✅ Post-Creation
- The campaign will appear in the Campaigns List with status “Active.”
- You can preview, edit, Deactivate, or Activate the campaign from the actions menu.
Updated about 1 year ago
Did this page help you?